If you've used Apple Photos and bumped into its limits, DxO PhotoLab 9 feels like the next room. It opens the same RAW files but gives you a bench of tools built for one job: turning sensor data into a clean, finished image.
- Lens-aware corrections. The software downloads a Module for your exact camera and lens combo. It fixes distortion, vignetting and chromatic aberration in one click — no guesswork, just lab-measured data.
- DeepPRIME noise reduction. This is where DxO Labs put its AI work. DeepPRIME demosaics and denoises simultaneously, pulling detail out of high-ISO shots that would otherwise look like crumpled paper.
- Smart Lighting. A single slider that lifts shadows and reins in highlights while keeping the shot believable. Good for backlit portraits or scenes with harsh window light.
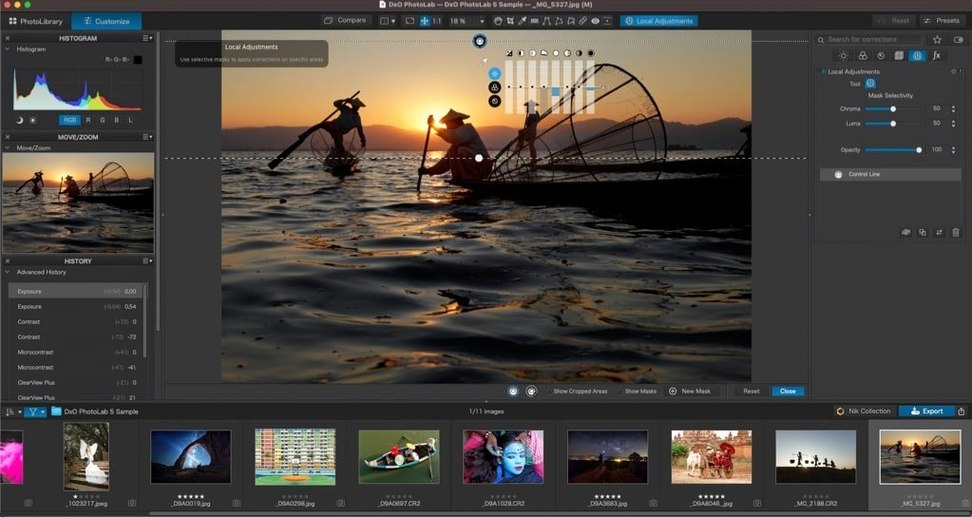
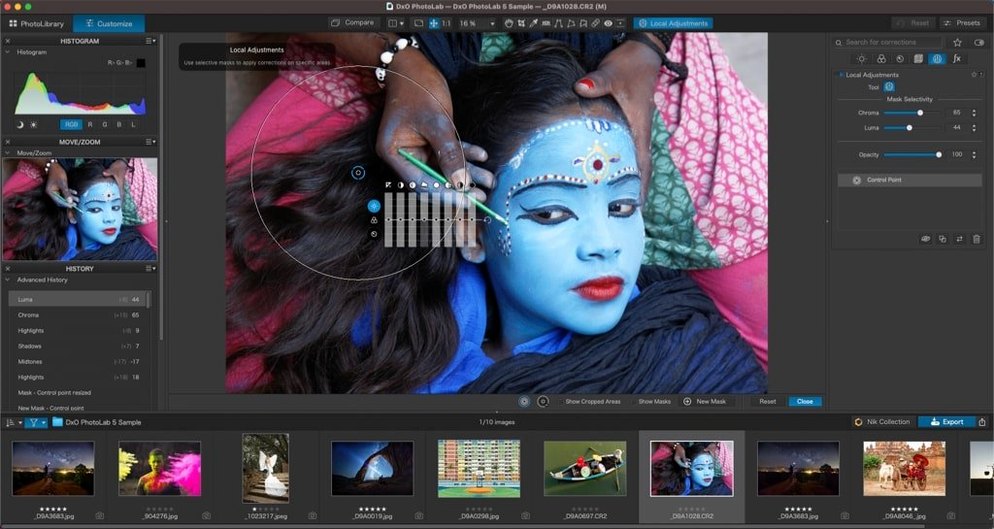
- U Point local adjustments. Click a spot, and a control point reads the colour and tone around it. You then adjust just that area — no masks to paint, no layers to stack.
Everything stays manual when you want it. You can override any automatic correction, tweak the PRIME noise reduction strength, or reset a control point without touching the rest of your edits. It supports RAW files from over 600 cameras, so your older Nikon or Fuji is likely covered.
Switch the colour space before editing anything
Open Preferences before you edit a single photo. Three things save you time later:
- Set your default working colour space. DxO PhotoLab ships with Classic (Legacy) as the default. Switch to DxO Wide Gamut for modern displays and prints — colours stay richer and more accurate through the whole pipeline.
- Point the software at your lens Modules. Under the DxO Modules tab, let it auto-download matched profiles. No Module means no optical corrections, so do this before importing a shoot.
- Pick your export preset now. Create a recipe for full‑resolution TIFFs and another for web‑size JPEGs. On a deadline, you'll just hit Export and pick from a list instead of re-entering dimensions and compression each time.
Also worth doing: open an old high‑ISO RAW, push DeepPRIME XD3 to about 40, and zoom to 100%. That one preview teaches you more about the denoising engine than any review.
Cull fast then copy a crop across 200 shots
Imagine a folder of 200 dance‑recital shots under terrible LED stage lights. Grainy, colour‑cast, and half of them need the same crop.
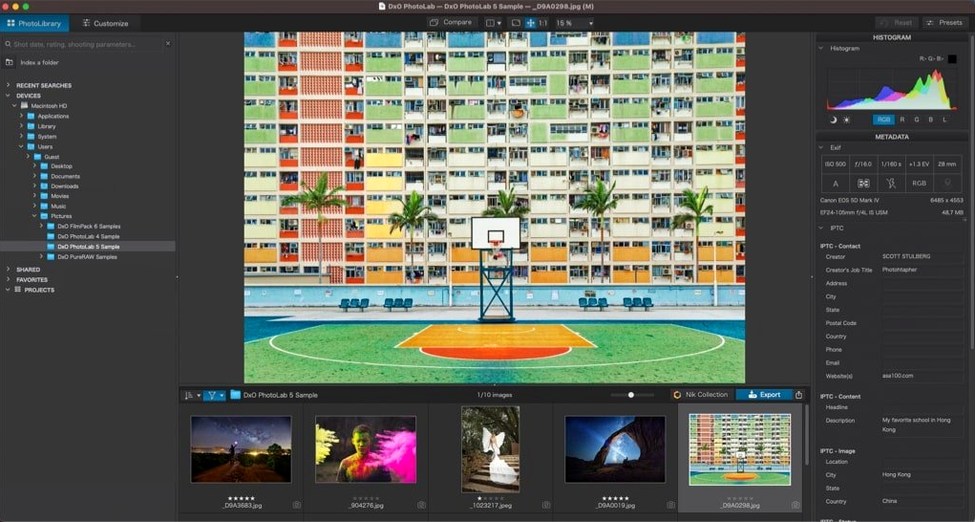
You open the folder in PhotoLibrary view. The thumbnails render fast — enough to cull the blurred frames straight away. You flag the 30 keepers with a star rating, then switch to Customize view on the first image.
The DxO Module loads and tidies the barrel distortion from your 85mm lens. Smart Lighting sits at 25 by default; you pull it to 40 to open the shadows on the dancer's face without blowing the spotlight. Next you add a control point on the face, lift microcontrast a touch, and copy those local adjustments.
Now you select the other 29 keepers, paste the control‑point edits, and press Ctrl‑C → Ctrl‑V on the adjustments. DxO PhotoLab asks whether to sync just the local corrections or the whole stack. You pick local only, because each shot needs its own crop. Ten minutes in, you have a consistent batch, and the noise looks like fine film grain instead of colour speckle.
Export runs as a background queue. While the TIFFs write, you start the next folder.
Hold Alt to reveal exactly where highlights clip
- Hold Alt while dragging a slider to see a clipping preview. Highlights blink white, shadows go black — it's the fastest way to set exposure without guessing.
- Double‑click any slider to reset it. Works on Smart Lighting, ClearView, and every local adjustment tool.
- Luminosity masks hide inside the control point panel. Right‑click a control point and switch the mask mode from colour to luminance. Suddenly you're adjusting only the bright parts of a sky, no colour selection needed.
- Rename your control points. Click the default label ("Control Point 1") and type "face" or "background". When you paste them across ten images, you'll know what each one does.
- Compare mode toggles with a single tap of the backslash key. Faster than hunting for the split‑screen icon when you want to check if the edit actually helped.
- The Repair tool doubles as a spot‑removal wand. Click a dust spot, and it samples from a nearby clean area. Hold Shift to draw a line over a scratch or a power line — they're gone in one stroke.

 DxO FilmPack 8
 DynamicLake Pro
 DVDFab
 Duplicate File Finder Pro
 Dropzone 5
 Dropover
 DriveDx
















Chat 0
Hop in or make an account to join the chat.
Quiet in here so far. If you have used this build, tell me what the install actually did.