
 Transmit
 TunesKit iPhone Unlocker
 Traktor Pro
 Tuxera NTFS
 TouchDesigner
 Typeface
 Typinator
 Topaz Video AI


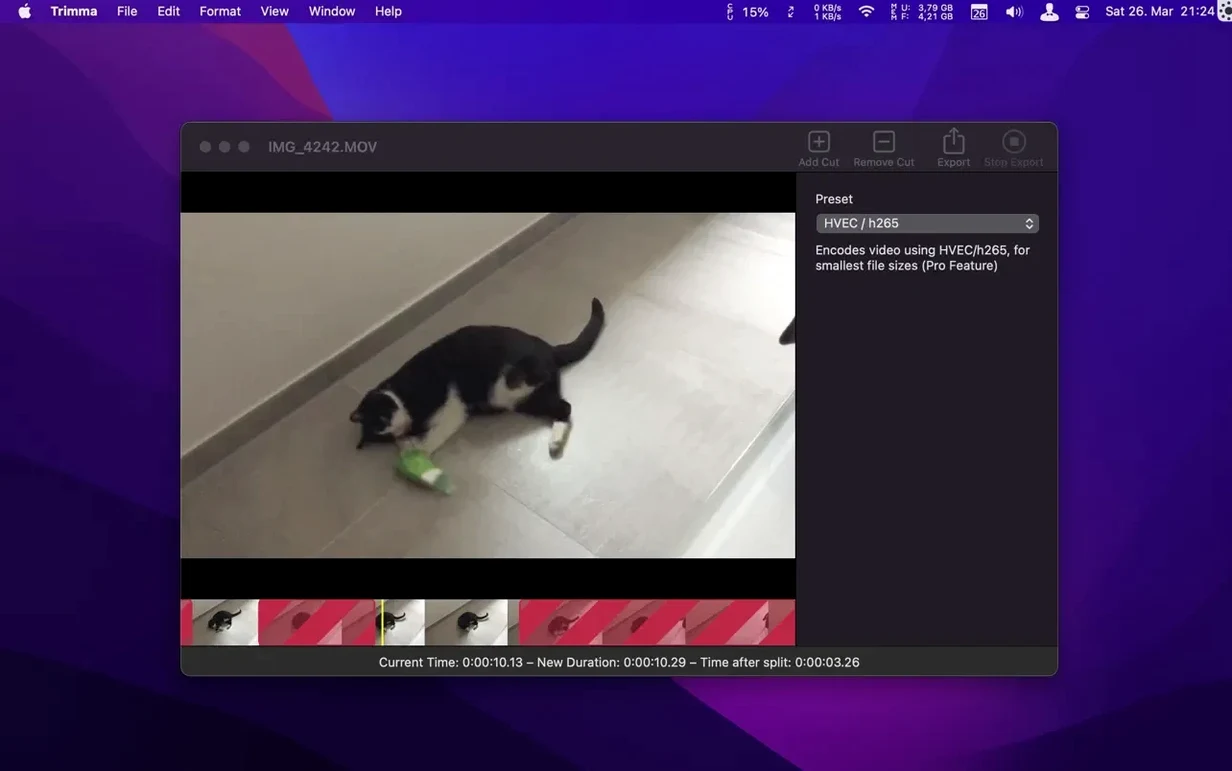
If you've used iMovie for a single, quick trim and found yourself lost in project creation, Trimma takes the opposite approach. It opens a video, lets you insert cuts, and exports the result—nothing more.
| Detail | Info |
|---|---|
| Current version | 2.2.2064 |
| Developer | Briksoftware.com |
| Export modes | Passthrough, AVC (H.264), Thumbnail |
What changed in this version is small but practical. A frame counter now appears in the details panel while you scrub or edit, so you can see exactly where you are. More importantly, exported MP4 files had a compatibility hiccup with QuickTime Player—that's been sorted. The core stays the same: you add and remove cuts with toolbar buttons or the A and S keys, then choose your export. Passthrough keeps the original encoding and is very fast, AVC re-encodes to H.264, and Thumbnail spits out a tiny low-quality clip. There are no export settings that meddle with resolution, and the app's single-window flow still feels like a utility, not a project.
Trimma isn't trying to replace a full editor. Think of it as the scissors you reach for between heavier sessions in Final Cut Pro or DaVinci Resolve. You've already rendered something, or a client sent a long screen recording—you just want the 30 seconds that matter. That's where passthrough export shines, because you're not waiting on a re-encode.
It plays nicely with Finder, too. Right-click a video, open it in Trimma, make your cuts, and save it back to the same folder. No library files, no hidden project folders cluttering your drive. If you use Quick Look to preview the result afterwards, the recent MP4 compatibility fix means it'll actually play smoothly now.
One workflow worth trying: keep Trimma in your Dock next to a lightweight player like IINA. Open the rough clip in the player to spot your in and out points, note the timestamps, then hop into Trimma and use the cursor keys for frame-accurate cuts. The new frame counter in version 2.2.2064 makes that second step much less guesswork.
Before 2.2.2064, trimming an MP4 and then previewing it in QuickTime Player sometimes gave you a file that wouldn't open properly. That's gone now. For anyone who uses QuickTime as their quick-check player—which is most Mac users—that fix removes a friction point that could make you doubt whether the export actually worked.
The frame counter is the kind of addition that feels small on a changelog but changes how precisely you work. Scrubbing without one meant estimating position from the playhead, which is fine for rough cuts but annoying when you need to land exactly on a scene change or a specific word in dialogue. Now the details panel shows the number, and you can step frame by frame with the cursor keys while watching it tick.
Passthrough is your go-to for anything headed back into another editor or archiving. The original codec stays untouched, and the speed is genuinely noticeable—a 2 GB clip finishes in seconds. AVC export to H.264 gives you a smaller file that's ready for Slack, WhatsApp or a quick upload, without you having to open HandBrake separately. The thumbnail mode isn't something you'll use daily, but if you need a tiny preview clip to attach to a client email, it's there.
If you're browsing for a trimma mac download that strips video trimming down to exactly what you need, the app's willingness to stay out of your way is its best feature. No project setup, no export dialogs full of resolution presets—just open, cut, save.
Good to know: the app is English-only and stays deliberately simple. No timelines, no tracks, no fuss.
No, Trimma does not use export settings that alter the video resolution.
Use the Passthrough export mode. It keeps the original encoding and is described as very fast.














Chat 0
Hop in or make an account to join the chat.
Quiet in here so far. If you have used this build, tell me what the install actually did.