
Download Omnisphere for macOS
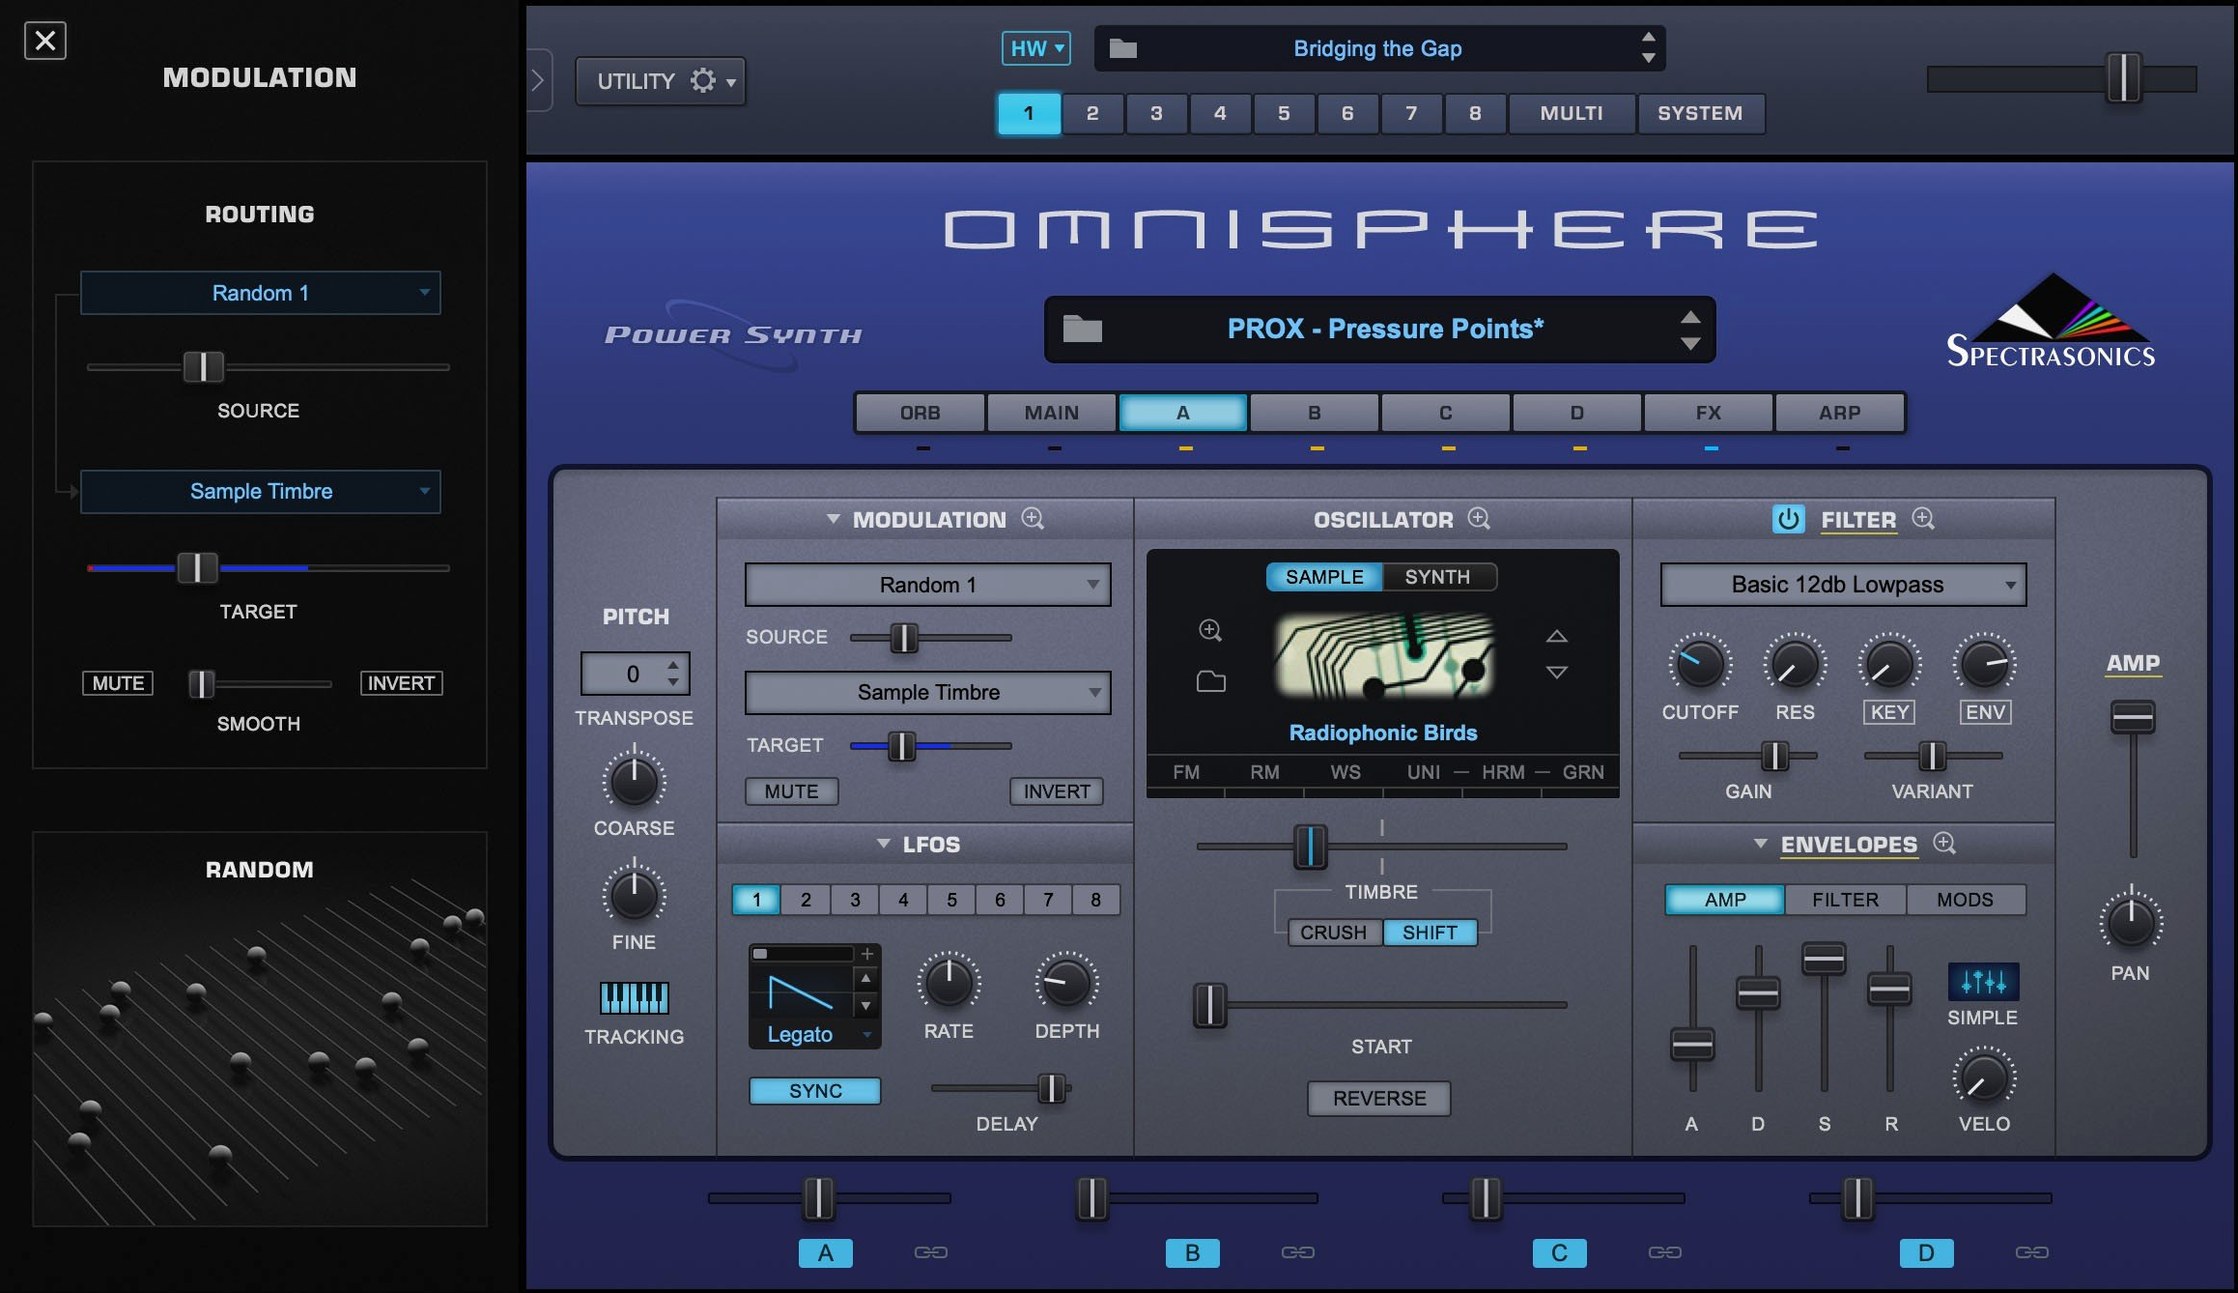
Over 14,000 sounds ship in the core library. That single number shapes how Omnisphere sits in a session: it rarely plays just one role. A typical project might have it on three or four channels, each doing something different.
- Keys and leads on instrument tracks. Drop the VST or AU version onto a MIDI track. Arpeggiated patches and polyphonic stacks cut through a mix without extra layering. Set the track output to your main stereo bus and pull the fader back — most presets arrive loud.
- Pads and swells on a dedicated bus. Send a long-reverb return into a stereo aux, then load Omnisphere as an insert. A slow-attack granular pad fed by the send adds movement behind vocals without fighting the dry signal. Automate the aux fader to swell between sections.
- Percussive hits and textures on sampler tracks. The factory library includes tuned percussion and one-shot textures. Place these low in the arrangement, panned wide. They glue better when routed through a short room reverb on a shared FX return.
Standalone mode works the same way for live keyboard rigs or quick sound design sessions outside a DAW. Hardware Synth Integration lets a connected synth control parameters directly, so you can browse and tweak from the panel instead of the screen.
Stacking patches without trimming the low end
Omnisphere rewards curiosity, but a few early habits can turn a session into a mess. Most are easy to undo once you spot them.
- Stacking presets without trimming the low end. The sound library is rich, and many patches already fill the full frequency range. Layering two or three without a high-pass filter on the extras turns a mix to mud. Use the built-in EQ on layer B or C — a gentle roll-off below 120 Hz often fixes it.
- Ignoring the master volume on patches. Factory presets don't follow a consistent gain structure. Skipping the level adjustment before recording means clipping your channel strip later. Pull the main volume knob down by 4–6 dB as a starting habit.
- Forgetting to save Multis. A Multi captures the whole setup — layers, effects, routing, and all. Building a complex sound and saving only the patch discards the blend. Hit Save Multi first, then save individual patches if you need them elsewhere.
- Overloading the arpeggiator on dense mixes. An arp pattern with 1/32-note steps and heavy delay sounds impressive soloed. In a full arrangement it creates a blur that masks vocals and snare transients. Switch the clock division to 1/8 or 1/16 and tighten the note length before adding more.
How Omnisphere compares with similar instruments
Three instruments often sit in the same conversation. They overlap in purpose but feel different under the hands.
Serum — a wavetable specialist with a cleaner, more clinical interface. Serum excels at modern bass design and tight, digital leads. Omnisphere covers those sounds too but leans into organic texture and hybrid patches. If you want a synth that does aggressive wavetable sweeps with minimal effort, Serum is quicker. If you need a cello that slowly morphs into a burning piano, Omnisphere is the tool.
Arturia Pigments — a multi-engine synth with a similar breadth of synthesis types. Pigments has a more visual modulation system and a sharper, modern GUI. Omnisphere's sound library is far larger, and its granular engine runs deeper. Pigments suits sound designers who want to see every modulation connection at a glance. Omnisphere suits producers who prefer browsing a curated library and tweaking from there.
Native Instruments Massive X — a semi-modular synth focused on raw oscillator tone and routing flexibility. Massive X has no sample playback or granular engine, so it can't touch Omnisphere's acoustic and textural side. For purely synthetic bass, plucks, and leads, both are capable. Omnisphere offers more preset variety out of the box; Massive X rewards deep custom patching.
Set the default MIDI channel to Omni
A few adjustments make daily use smoother. These aren't buried — they're just easy to overlook when you first install.
- Set the default MIDI channel to Omni. This avoids silent patches when switching controllers or DAW tracks. Find it under the System pane, in the MIDI section.
- Disable the built-in limiter for sound design. The output limiter protects speakers but masks dynamic changes when you're building patches. Switch it off while designing, then re-enable it before mixing.
- Adjust the sample streaming cache. In the System settings, increase the cache size if you have RAM to spare. It reduces disk access when browsing large granular patches and keeps the browser snappy on older drives.
- Map Hardware Synth Integration to your controller. Even a basic MIDI keyboard with a few knobs benefits from the automatic mapping. Tick the Enable HW Synth Integration box and select your device from the list — the software handles the rest.
The browser got noticeably faster
The move to version 3.0.2c brought refinements rather than a full redesign, but a few changes affect how you work day to day.
The browser got noticeably faster. Scrolling through the 14,000-sound library with category filters applied no longer pauses to load previews, which matters when you're auditioning pads against a running arrangement. Patch recall after project reload is tighter — fewer instances of a Multi loading with one layer silent, an occasional quirk in earlier builds.
Hardware Synth Integration profiles expanded. More modern synths and controllers are recognised on connection, and parameter mapping is more consistent across the supported brands. If your controller was partially mapped before, it likely works fully now.
Under the hood, Apple Silicon support is native, not translated. On ARM Macs the standalone app and all plug-in formats run without Rosetta, which means lower CPU load on larger Multis and shorter project load times. The update also tidied a few graphic glitches on high-resolution external displays — the interface stays crisp when dragged between a MacBook screen and a 4K monitor.
Good to know: the free update path from 3.0.0d to 3.0.2c means anyone with an earlier 3.0 version already has access to these improvements without reinstalling the factory library.
- Reference guide updated to Software 3.0.2c.
- macOS 11 or later
- Intel or Apple Silicon Mac
Questions I get
Yes. The current version supports both ARM and x86 64-bit macOS systems.
The installer provides VST, AU, and AAX plug-ins alongside a standalone application.
It is a feature that maps Omnisphere’s parameters to a connected hardware synth, letting you browse and edit sounds from the physical controls.


Chat 0
Hop in or make an account to join the chat.
Quiet in here so far. If you have used this build, tell me what the install actually did.